A surprisingly quick solution exists.
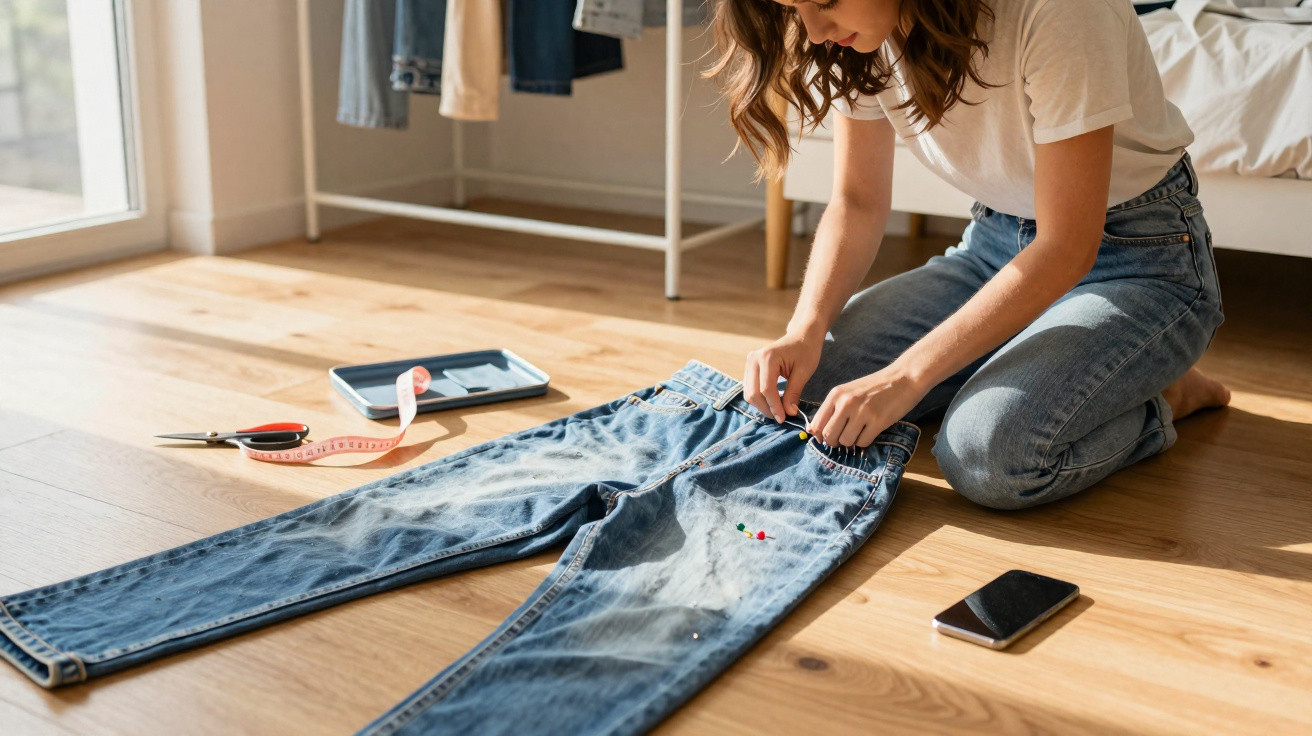
Many fashion enthusiasts know the feeling: you find the perfect vintage piece at a flea market or through an online second-hand shop – until you try it on. Suddenly it pinches everywhere, the zip refuses to move and the dream of a retro look seems set to fall apart. Before giving up or paying for costly alterations, take a closer look: a few simple adjustments can often create the equivalent of an entire size.
Why vintage clothing nearly always comes up smaller today
Taking old size labels at face value is an easy mistake. A size 40 skirt from the 1970s is roughly the equivalent of today’s size 36. Official sizing charts have changed considerably over the decades – along with our bodies and lifestyles.
Many older garments were also cut more closely to the body. They fit more snugly, with most of the tension concentrated along the side seams. Although this creates a flattering shape, it leaves little of the freedom of movement expected today. Pulling too hard can permanently damage both the fabric and the stitching.
Good news: it is often possible to gain one to four centimetres of extra room – without spoiling the silhouette.
What matters is whether the garment is made from natural fibres such as cotton, as well as how it has been constructed. Particularly with rigid denim and closely cut skirts or dresses, there are smart methods to try before undertaking major alterations.
How much extra room is realistic? The four-centimetre limit
When people talk about gaining “one size”, they generally mean around four centimetres more circumference at the crucial point: the waist, hips or bust. In practical terms, this is divided in two directions, allowing roughly two centimetres on each side.
That may not sound like much, but it has a noticeable effect. Just two or three centimetres can turn something from “uncomfortably tight” into “pleasant to wear”. If more room is needed, gentle stretching of the material will usually no longer be enough; a proper alteration to the cut is then the only solution.
The 5-minute trick: make a vintage jeans waistband noticeably wider
This works fastest with jeans made from 100 per cent cotton, meaning without any stretch content. Pure cotton responds strongly to moisture and tension: its fibres swell, can be shaped, and then settle into position as they dry.
Step-by-step guide for jeans that are too tight
- 1. Dampen the waistband: Spray the waistband and upper hip area generously with lukewarm water until the fabric is clearly damp.
- 2. Put on the jeans: Wear and fasten the still-damp jeans, even if they feel noticeably tight.
- 3. Start moving: Do squats, lunges and gentle torso twists for three to five minutes. This directs the tension specifically into the waistband and hip area.
- 4. Let them dry: Allow the jeans to air-dry and do not use a tumble dryer. This helps the added width stay more stable.
Depending on the density of the fabric, this method can create up to around three centimetres of extra room at the waistband. For anyone who would rather not wear damp jeans, there is an alternative:
Stretch the damp waistband over the widest possible wooden hanger or an improvised “stretching frame”, then leave it to dry in that position.
Do not overdo it. If the seams start cracking sharply while stretching, or the fabric pulls pale, stop immediately. The jeans have reached their load limit.
Vintage skirt or dress too tight? An unobtrusive insert can help
The 5-minute trick has limited use for skirts and dresses. Instead, seamstresses rely on another classic technique: the so-called gusset or triangular insert, often called a “soufflet” in dressmaking.
Side inserts for greater freedom of movement
The principle is simple: open the side seam slightly and add a small fabric triangle, which distributes the tension and creates more space.
Here is how to do it step by step:
- Open the side seams: Unpick around five to seven centimetres of the side seam where the fabric is under the greatest strain, usually at the hip or waist.
- Prepare the insert: Cut a piece measuring roughly six by eight centimetres from fabric that is as similar as possible – or choose a contrasting material deliberately for a fashionable effect. Fold it in half to form a triangle.
- Sew in the triangle: Place the point of the triangle facing downwards into the opened seam, leaving a V shape at the top. Stitch both sides of the triangle securely using close stitches.
- Repeat on both sides: Follow the same process on the other side seam so the silhouette remains balanced.
Two neatly inserted triangles can add up to four centimetres to the overall circumference while keeping the garment’s original shape recognisable. This technique is especially discreet on pencil skirts or slim vintage dresses, yet greatly improves comfort.
A practical example: when the zip gets stuck
Imagine finding the perfect slim 1960s statement skirt. The fabric, colour and length are all right, but there are three centimetres missing when you try to close the zip. Rather than returning the skirt in frustration, you can do the following:
Slightly loosen the belt loops and waistband at the sides, create small openings to the left and right of the zip, then insert a short triangle of firm, wide elastic into each opening. This adds flexible give exactly where the garment is tightest.
The zip closes again, the skirt’s appearance remains almost unchanged and it feels far more comfortable for everyday wear. This careful approach is particularly worthwhile for finds with high sentimental or financial value.
What to check before making any alteration
- Material: Pure cotton, linen and wool respond well to moisture and tension. Synthetics and blended fabrics are often less flexible.
- Seam allowances: Some vintage garments have an extra one or two centimetres of fabric inside their seams that can be let out. Checking the inside can sometimes work wonders.
- Condition of the fabric: Do not put further strain on areas that are badly thinned, fragile or already repaired several times.
- Value of the garment: For very rare designer pieces, it is best to consult a professional alterations service.
Risks, limits and when to visit a seamstress
Not every pair of trousers or dress can be widened without difficulty. If jeans contain a high proportion of elastane, stretching often achieves little because the material springs back to its previous shape. Very densely woven fabrics also yield only minimally.
Stretching too aggressively risks permanent distortion, including baggy knees, crooked seams or rippling at the waistband. Such flaws are especially obvious on patterned or checked fabrics. When in doubt, work gradually towards the required width and check after every step how the garment feels on your body.
Why the effort is worthwhile – and how to keep vintage looking good for longer
Well-fitted vintage pieces have a charm that fast fashion rarely achieves: quality fabrics, distinctive cuts and often hand-finished details. Investing a little time in the fit gives you a one-of-a-kind garment that can last for decades.
After widening a garment, treat it gently: avoid extreme temperatures, air-dry instead of using a tumble dryer, and occasionally reshape it while damp. This keeps jeans, dresses and skirts wearable and lets them gain more character with every year – while, ideally, continuing to fit just as well as they did after the small 5-minute adjustment.














Comments
No comments yet. Be the first to comment!
Leave a Comment