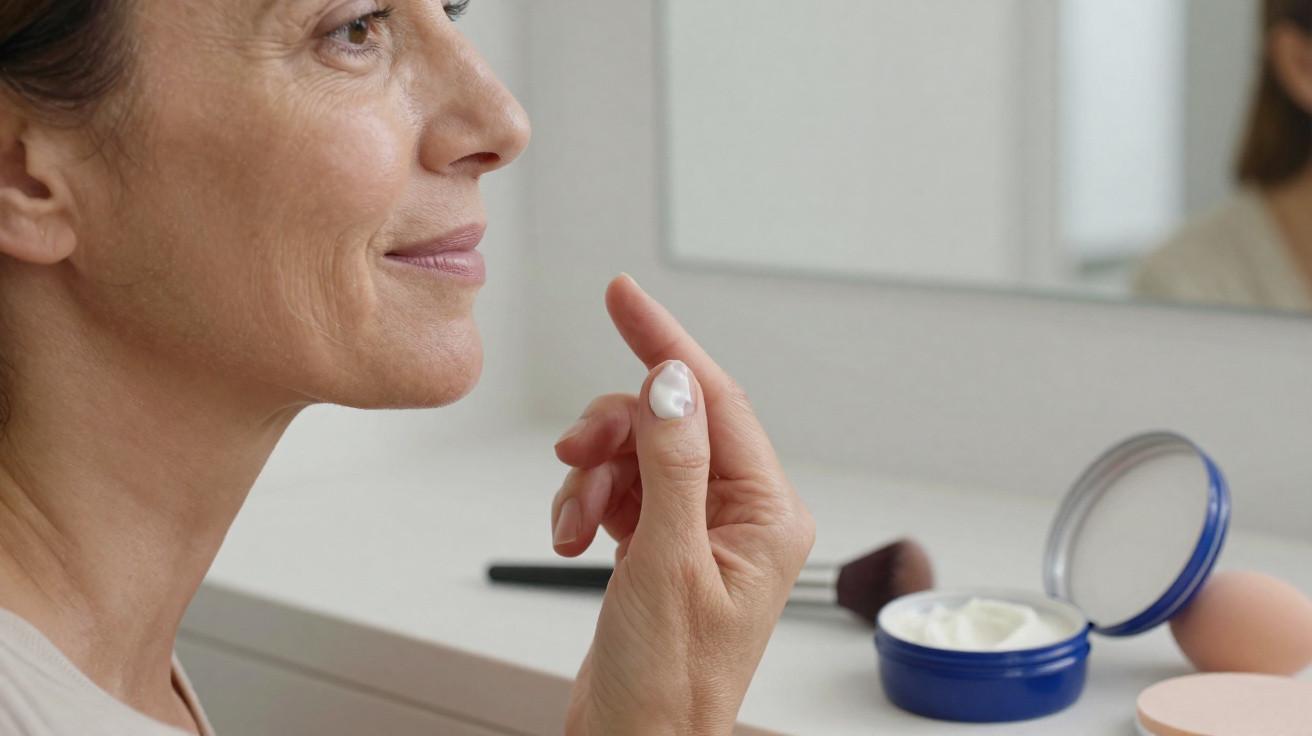
Make-up that settles into fine lines can make a carefully applied base look dry, heavy or uneven by lunchtime. It is a common frustration for people over 50, especially when colder weather, central heating or naturally drier skin leave the complexion feeling tight.
A small amount of Nivea Creme from the classic blue tin may help as a rich moisturising layer beneath make-up if your skin is dry or dehydrated. It cannot prevent wrinkles or remove fine lines, but, used sparingly, it can make foundation sit more smoothly and draw less attention to areas of texture.
Why foundation can settle into fine lines
Fine lines are a normal part of skin ageing and facial movement. They can appear more obvious when make-up sits on dry skin, flaky patches or an overly thick layer of skincare and base products.
Areas that tend to move most include:
- the sides of the eyes;
- the forehead;
- the crease between the brows;
- around the mouth;
- beneath the eyes.
A matte foundation, full-coverage concealer or too much powder can cling to these areas. Skin can also be dehydrated while still becoming oily across the forehead, nose and chin, so the same preparation will not suit every part of the face.
The aim is not to erase lines. It is to make the skin feel comfortable and flexible so make-up is less likely to gather in them.
What a rich cream can do before make-up
Nivea Creme has a thick, rich texture that helps reduce the tight, papery appearance associated with dry skin. When used in a very thin layer, it may leave the surface feeling softer and help a light foundation spread more evenly.
This can be particularly useful in autumn and winter in the UK, when wind and indoor heating can leave skin feeling less comfortable. Its role is closer to nourishing skin preparation than a traditional silicone-based primer.
It will not suit everyone. Very oily skin, skin that is prone to blocked pores, or a foundation that already feels emollient may respond better to a lighter moisturiser instead. It also does not replace daytime sunscreen.
Who may find the technique useful
It may be worth trying if you have:
- dry skin that feels tight after cleansing;
- normal skin that becomes drier in colder months;
- flaky areas around the nose or mouth;
- mature skin that looks better with creamy, flexible base products;
- foundation that appears dull or uneven soon after application.
If you are prone to regular breakouts, congestion or a very shiny T-zone, start with a lighter, fragrance-free moisturiser. Reserve richer cream for dry patches rather than applying it across the whole face.
How to use it beneath foundation
The amount matters more than the product. Too much cream can make foundation slide, separate or become shiny.
1. Begin with clean skin
Cleanse gently and apply any usual hydrating serum or eye product. If you use retinoids, exfoliating acids or another active treatment, follow that product’s instructions and keep the routine simple if your skin feels sensitive.
In the morning, use a broad-spectrum sunscreen. Let it settle before adding make-up. A moisturising cream is not a substitute for SPF.
2. Use less than you expect
Start with no more than a small pea-sized amount for the whole face. If your skin is combination, use it only where you are dry, such as the cheeks, temples and around the mouth.
Warm the cream between clean fingertips before applying it. This makes a dense formula easier to spread in a fine, even layer.
3. Press it into dry areas
Press the cream gently into the areas that need it most, then lightly smooth any remaining product over the skin. Avoid vigorous rubbing, particularly around the eye area.
Do not pack cream directly into creases in an attempt to fill them. Excess product can collect in folds once foundation is applied.
4. Let it settle
Wait for roughly five to ten minutes before applying your base. Your skin should feel comfortable and moisturised rather than wet, greasy or tacky.
If the surface still feels slippery, gently blot excess with a clean tissue. This brief pause can make a noticeable difference to how the foundation wears.
5. Keep base layers light
Apply foundation in a thin layer, building only where additional coverage is genuinely needed. A damp sponge, soft brush or clean fingertips can all work well if they leave an even finish.
Use concealer sparingly beneath the eyes, then set only the areas that tend to shine or move most. A small amount of loose powder is often more forgiving than heavily powdering the whole face.
Pair it with compatible formulas
A rich moisturising base generally works best with foundations that have a natural, satin, radiant or hydrating finish. These formulas are often more flexible than very matte, fast-setting products.
Matte foundation can still work, but apply it in small sections and avoid using too much cream underneath. A rich base combined with a large amount of fast-setting foundation may lead to pilling or separation.
For a simple daytime order, try:
- Gentle cleanse.
- Optional hydrating serum.
- Broad-spectrum sunscreen, allowed to settle.
- A tiny amount of cream on dry areas.
- Thin foundation and targeted concealer.
- Powder only where needed.
A fresh-looking finish usually comes from hydration and restraint, not from layering several rich products at once.
Common mistakes that can make texture stand out
Even helpful skin preparation can backfire when there is too much product underneath the foundation.
- Using a thick layer of cream: Foundation may slip, pill or gather around the nose and mouth.
- Applying it everywhere automatically: Dry cheeks may benefit while an oily forehead may not.
- Rushing straight into foundation: Give skincare time to settle before adding colour products.
- Using heavy foundation to hide texture: Thick coverage can make lines and dry patches more noticeable.
- Over-powdering: Powder controls shine, but too much can leave skin looking dry and can settle into lines.
- Adding too much concealer beneath the eyes: Several thin dots are usually easier to blend than one heavy swipe.
- Expecting expression lines not to move: A natural, flexible finish is usually more flattering than trying to create a completely smooth mask.
Safety and skin-comfort notes
Cosmetic products are individual in their suitability, and formulations can change. Check the ingredient list on the tin you own, particularly if you have known sensitivities.
Patch test a new product first by applying a small amount to the inner arm or behind the ear. Stop using it if you notice stinging, a rash, swelling, persistent redness or an increase in breakouts.
Keep cream out of the eyes themselves, and do not apply fragranced cosmetic products to broken, inflamed or actively irritated skin. If you have an ongoing skin condition or a reaction that does not settle, seek advice from a pharmacist, GP or other appropriate healthcare professional.
If you are acne-prone or susceptible to folliculitis, test the technique on one dry area, such as a cheek, before using it more widely. A lightweight moisturiser may be more comfortable beneath foundation.
Test it before relying on it
Try the method on a day when you are not in a hurry. After your usual skincare and SPF, apply the tiniest amount of cream to one side of the face only. Use the same foundation across both sides and check the result after an hour or two in natural light.
Look for comfort as well as appearance. Does foundation look smoother? Has it moved around the nose and mouth? Is one side noticeably shinier? If the cream feels too rich, use less next time or keep it for the cheeks and other dry areas.
The blue tin can be a useful option if your skin prefers a richer make-up base, particularly in colder months. The most flattering result usually comes from a light hand, a few minutes of settling time and thin, flexible layers of make-up afterwards.
















Comments
No comments yet. Be the first to comment!
Leave a Comment