The shirt itself is ideal. Or it was when you put it on the hanger with the best intentions and all the time in the world. Now, half dressed and running late in the hallway, you are looking at a collar that appears to have spent the night in a gym bag. The iron is buried somewhere in the cupboard, the ironing board is in that alternate dimension known as “behind the vacuum cleaner”, and your taxi app is buzzing like a guilty conscience.
Then you look into the bathroom and notice something else: the hair straightener you used ten minutes earlier. Heated plates. A precise grip. It is already plugged in.
Your mind makes that familiar little click when an unexpected shortcut presents itself.
When your collar ruins an otherwise perfect outfit
Few things are more irritating than one creased detail spoiling an otherwise good outfit. Your shirt is fresh, your jeans look fine, your hair is behaving for once, yet the collar has chosen to resemble crumpled paper. You do not have ten minutes to spare; you have one.
At this point, people either surrender and claim that “casual crumpled” is a look, or grab the nearest drastic solution. This is where the hair straightener comes in, sitting quietly on the bathroom shelf like a concealed weapon.
Imagine a Monday morning at 8:37 a.m., with first-day-in-a-new-job nerves already setting in. One young woman I spoke to had changed her shirt twice, only to discover that both collars had been creased in the wardrobe. She lives in a very small flat, with no room at all for an ironing board. The iron is somewhere after her last move, still wrapped in bubble wrap.
In a panic, she noticed her straightener open on the sink. Acting on instinct, she clamped it over one collar point, drew it through slowly and saw the crease vanish in a single smooth pass. After two passes, both sides were sharp. She was still late. Her collar, however, was flawless.
The reasoning is sound when you consider it. A hair straightener is effectively a miniature iron with clamps: two heated plates, a controllable temperature and pressure directed exactly where it is needed. Rather than pulling a heavy soleplate across half a shirt, you work as a detail painter would, concentrating on edges, plackets and hems.
That accuracy is invaluable on small areas. In most cases, nobody notices that an entire shirt has not been perfectly pressed. What they do see is the collar, the top buttons and the exposed hem. This is precisely where the trick works best: it is focused, quick and remarkably effective.
How to “iron” a collar or hem with a straightener without wrecking your clothes
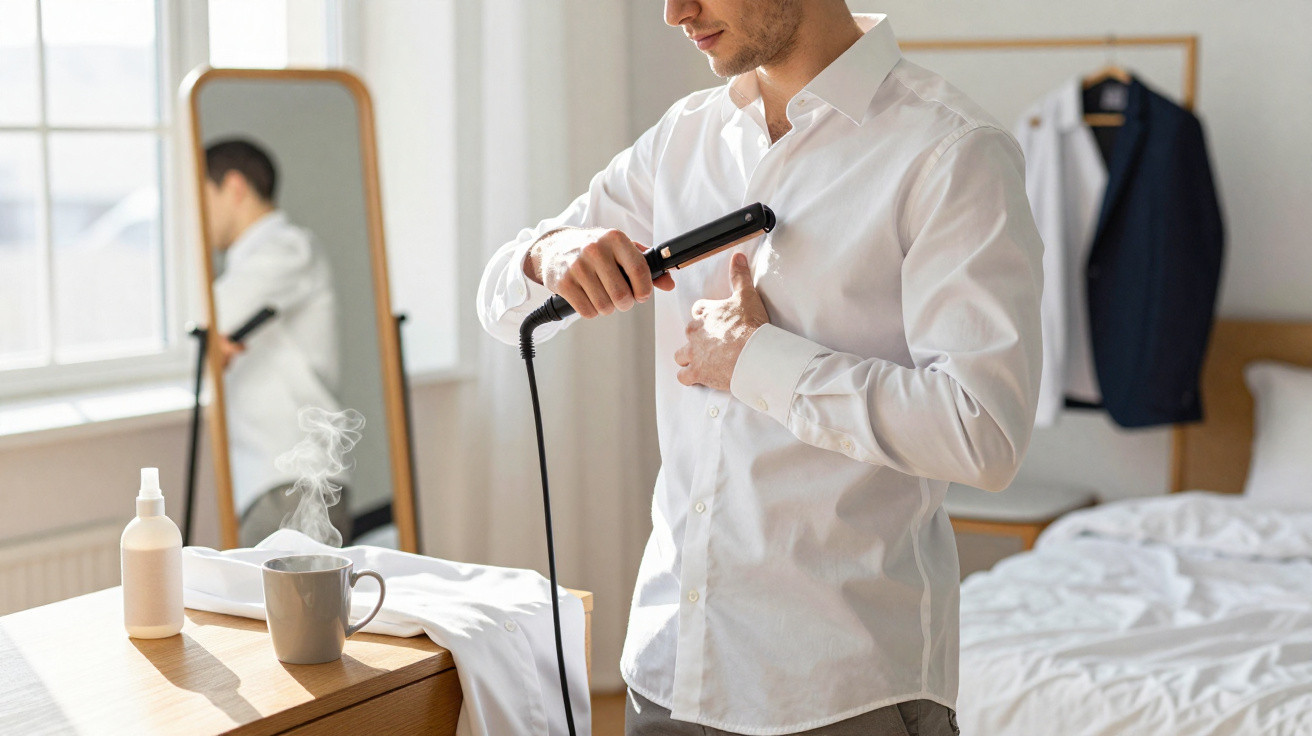
The movement itself is straightforward. Switch on your straightener and choose a medium setting, rather than the maximum heat you might use on stubborn curls. While it warms up, smooth the shirt over a level surface - a bed, table or even the back of a chair if that is your only option.
Begin with the collar. Lay it open and flat, hold the straightener like tongs, then position it at the point of one side. Clamp it gently and slide slowly in one continuous movement towards the centre. Usually, one or two passes will do the job. Repeat the process on the other side. Use the same method for a hem or button placket, working in small sections and keeping the straightener moving rather than holding it in place.
Small errors can easily undermine this handy method. The most obvious is using too much heat: synthetic materials and high temperatures are not a good combination. Lower settings are safer, particularly with polyester, viscose and blended fabrics. If you are unsure, try it on an inner seam first.
Another frequent mistake is moving too quickly and squeezing the plates shut too firmly. A straightener is not a nutcracker. Gentle pressure is enough; anything more may leave glossy marks on dark fabrics or flatten seams oddly. Realistically, this is not something anyone does every day. It is an emergency solution, not a replacement for a full laundry routine.
There is a psychological element to the shortcut too. Applying a hair tool to clothing can feel as though you are crossing an invisible boundary between an “organized adult” and a “creative survivor”. But after trying it for small touch-ups, people almost never return to the ironing board.
“I stopped dragging out the ironing board for one shirt,” laughs Camille, 29. “If I only need the collar and the front to look sharp on video calls, the straightener does the job in two minutes. Nobody knows what’s going on below the webcam frame.”
- Make sure the straightener plates are clean and free from product residue, which could stain fabric.
- Use medium heat or lower for delicate or synthetic materials.
- Only work on dry clothing; damp fabric can stretch or warp.
- Concentrate on the visible areas: collar, cuffs, top buttons and hemline.
- Keep the plates in motion to avoid scorch marks or shine.
Turning a “hair” tool into a quiet ally for last-minute polish
Once you know this method, the straightener in your bathroom starts to look different. It is no longer solely a beauty tool; it quietly becomes part of a modern-life survival kit, useful for Zoom interviews, hurried dinners, surprise invitations and mornings when everything seems slightly out of sync.
You will not always have the time, room or, truthfully, the energy to set up an ironing board and act as if you live in a flawlessly organised catalogue home. Sometimes, you are simply thankful for anything that gives you five more minutes in bed while still allowing you to look as though you made an effort. This small hack belongs in that exact space: between compromise and care, between “good enough” and “I still want to feel put-together”.
| Key point | Detail | Value for the reader |
|---|---|---|
| Use a straightener as a mini iron | Use medium heat, gentle pressure and slow movements on collars and hems | A rapid solution when you are rushed and do not want to set up the full ironing kit |
| Protect your fabrics | Test an inside seam, avoid high heat on synthetics and clean the plates beforehand | Lowers the chance of shine, scorching or product marks on favourite shirts |
| Target only visible areas | Collar, cuffs, top buttons and lower hemline | The greatest visual effect for the least time and effort |








Comments
No comments yet. Be the first to comment!
Leave a Comment